※当サイトにはプロモーションが含まれています。
ボタンの上に設置する変わった動きをする矢印を作ってくれ
・・・・・・おけまるだにゃ
安易に手を出してしまったThree.js。
Three.jsは、WebGLを用いて3Dグラフィックスをブラウザ上で簡単に表示・操作できるJavaScriptのライブラリです。複雑な3Dシーンやアニメーションを描画できるので、ゲーム開発やVRなどに使われています。
取り組んではみたものの難しい。
試行錯誤したうえにできたのがコレ・・・。
よくわからないものに手をだすんじゃなかった──。
ただ、せっかく作ったので公開します。
3Dのアニメーションの矢印を作成してみた
3Dアニメーションの矢印を作成する、javascript、CSS、HTMLです。
HTML
<div id="animation-arrow" class="animation-container"></div>
これを矢印を描画したい箇所に記載します。
また、「Three.js」を使用するため、ライブラリーを読み込んでおきます。
<script src="https://cdnjs.cloudflare.com/ajax/libs/three.js/r128/three.min.js"></script>
<script src="https://cdnjs.cloudflare.com/ajax/libs/tween.js/18.6.4/tween.umd.js"></script>
CSS
.animation-container {
width: 360px;
height: 200px;
margin: 0 auto;
padding: 0;
position: relative;
background-color: #ffffff;
}

.animation-canvas {
display: block;
width: 100%;
height: 100%;
}ワードプレス(WordPress)に埋め込んでいるため、widthとheightを固定値にしています。
JavaScript
 document.addEventListener('DOMContentLoaded', function() {
const container = document.getElementById('animation-arrow');

// シーンの作成
const scene = new THREE.Scene();

// カメラの作成
const camera = new THREE.PerspectiveCamera(75, container.clientWidth / container.clientHeight, 0.1, 1000);
camera.position.z = 5;

// レンダラーの作成
const renderer = new THREE.WebGLRenderer({ antialias: true });
renderer.setSize(360, 200); // 固定サイズを設定
renderer.setClearColor(0xffffff); // 背景を白に設定
container.appendChild(renderer.domElement);
renderer.domElement.classList.add('animation-canvas');

// 矢印の形状を定義
const arrowShape = new THREE.Shape();
arrowShape.moveTo(0, -1);
arrowShape.lineTo(0.4, -0.6);
arrowShape.lineTo(0.2, -0.6);
arrowShape.lineTo(0.2, 1);
arrowShape.lineTo(-0.2, 1);
arrowShape.lineTo(-0.2, -0.6);
arrowShape.lineTo(-0.4, -0.6);
arrowShape.lineTo(0, -1);

// 立体形状の矢印を作成
const extrudeSettings = { depth: 0.5, bevelEnabled: false };
const geometry = new THREE.ExtrudeGeometry(arrowShape, extrudeSettings);
const material = new THREE.MeshPhongMaterial({ color: 0xff0000 });
const arrow = new THREE.Mesh(geometry, material);
arrow.scale.set(4.2, 1.8, 3);
scene.add(arrow);

// 点光源の追加
const pointLight = new THREE.PointLight(0xffffff, 1, 100);
pointLight.position.set(0, 3, 5);
scene.add(pointLight);

// 環境光の追加
const ambientLight = new THREE.AmbientLight(0x404040);
scene.add(ambientLight);

let isRotating = true;

// 矢印のアニメーション設定
const upDownAnimation = () => {
new TWEEN.Tween(arrow.position)
.to({ y: 0.3 }, 1000)
.easing(TWEEN.Easing.Quadratic.InOut)
.yoyo(true)
.repeat(Infinity)
.start();
};

const rotationAnimation = () => {
new TWEEN.Tween(arrow.rotation)
.to({ z: Math.PI * 2 }, 2000)
.easing(TWEEN.Easing.Quadratic.InOut)
.repeat(Infinity)
.start();
};

const colorChangeAnimation = () => {
new TWEEN.Tween(material.color)
.to({ r: 0, g: 0, b: 1 }, 2000)
.easing(TWEEN.Easing.Quadratic.InOut)
.yoyo(true)
.repeat(Infinity)
.onRepeat(() => {
isRotating = false;
new TWEEN.Tween(arrow.position)
.to({ y: arrow.position.y + 0.1 }, 200)
.easing(TWEEN.Easing.Quadratic.InOut)
.yoyo(true)
.repeat(1)
.onComplete(() => {
new TWEEN.Tween(arrow.position)
.to({ y: arrow.position.y + 0.1 }, 200)
.easing(TWEEN.Easing.Quadratic.InOut)
.yoyo(true)
.repeat(1)
.onComplete(() => {
isRotating = true;
})
.start();
})
.start();
})
.start();
};

upDownAnimation();
rotationAnimation();
colorChangeAnimation();

// アニメーションループ
function animate(time) {
requestAnimationFrame(animate);
TWEEN.update(time);
if (isRotating) {
arrow.rotation.y += 0.01; // 回転を少しだけ加える
}
renderer.render(scene, camera);
}
animate();

// ウィンドウリサイズ対応
window.addEventListener('resize', function() {
const width = 360; // 固定サイズ
const height = 200; // 固定サイズ
renderer.setSize(width, height);
camera.aspect = width / height;
camera.updateProjectionMatrix();
});
});ワードプレスに埋め込むため、renderer.setSize(360, 200);で、サイズを固定しています。
arrow.scale.set(4, 1.8, 3);の値を変更すると、矢印の大きさを変更することができます。
また、スマホなどで見た時の対応(ウィンドウリサイズ)として、 const width = 360;、const height = 200;で、固定サイズを設定しています。
却下!
ですよね・・・。
なお、Three.jsは、Udemyで学ぶことができます。
Udemyは、世界190ヶ国以上に展開しているオンライン講座で、日本ではベネッセコーポレーションが運営しています。
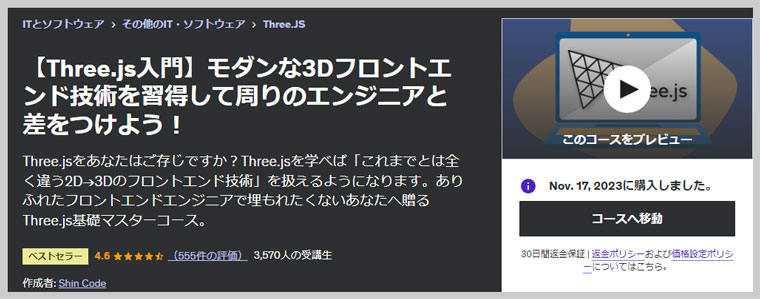
Udemyは、定期的に90%OFFセールをしているので、興味があったら確認してみてください。

